Showing posts with label makeupaffairsqtr. Show all posts

Friday, March 21, 2014

Naked III

Naked III


henribendel.com


sephora.com


sephora.com


urbandecay.com


Hello!

Few months ago Urban Decay launched their third Naked palette, which I personally died when I saw Kandee Johnson's review. The Naked III comes in rose gold undertones that compliments most if not all skin tones. The palette has 12 eyeshadows (matte, shimmer and satin consistency). It is definitely worth each riyal I paid for<3 believe me I paid more for dior palette's, which I barely use #fail #tooprettytouse. 

Instead of talking about the entire palette im going to give a brief description of my favorite colors, so lets do it! As a senior I promised myself that I will never leave my house to any of my classes without getting dolled up. WHY? First, I did once last year and till now I cant forgive myself for that. Second, im a smarty in disguise #smart&cute #makeupaddict. Anyway here is my favorite eye combination using Naked III: 

1 ) Daily look: Nooner (inner lid),  (middle of lid)
,Limit (crease), Strange (brow bone) with eyeliner. 
2) For Dramatic look(my favorite I wore this look twice): Trick ( inner corners), Darkside(middle lid), Blackheart( crease), Strange( brow bone) with purple liquid eyeliner the one I used is by YSL( no.12). To complete this look you have to wear a pair of false eyelashes. 

I have to admit for the first time I'm loving the shimmery colors in a NAKED palette. I'm staring at my palette and shockingly the most used colors are the glittery colors! #imallowedtochangemymind #imawoman. 

Many people complained that shimmery colors didn't adhere to their eyes even when they used urban decay's primer potion. The secret is to dab your brush into the desired color and then spray it with all nighter and dab it once again into the color and then apply it all over your lid. #secret #tip 

Lastly, in my next post I will show you how to do it or maybe I will post a video on my Instagram  on how to apply a shimmery loose powder or eyeshadow. My account is  makeupaffairs make sure to follow it. #follow4fun #sharethelove

xoxo 

Rouda <3


Saturday, February 23, 2013

Nail It

Untitled #12


Essie nail polish


Once again I return after disappearing for few months =) 
Anyway I went on a very interesting journey las year and I cannot wait to share the details and my beauty findings with you.

Yesterday someone posted a comment asking about nail polishes and I decided to write a post about the following brands: essie, orly and china glaze. I'm going to write about pros and cons and how I feel about the product itself. 


Essie: 

Fortunately, essie is one of the brands that you can find easily in Doha. Many beauty stores and nail salons will sell you essie products, so you don't need to panic when you are looking for a certain color. 
Moreover, the nail polish pay off is so very good in comparison to high end nail polishes. The price is ok which is around 40 something riyals. 

However, I hate the light colors from essie: 

1) The color changes into this awkward color after one day of applying the nail polish, even after applying a very good top coat. 
2) You need to apply at least three coats to get the exact color as the bottle ( I mean the nail polish).
3) It takes long time to dry if you applied three coats of nail polish, so don't bother applying the nail polish if you are going to rush out the door in 30 minutes! 

Lastly, there is a very good store in Alsad road near Almuftah Jewlery and right above Larissa store( I totally forgot the name of the store). They have the entire collection and the guy will give you a good price. 

China glaze: 

It is hard to find in Doha, the only place that I know that sells china glaze are the express beauty booths in Villagio and Landmark. The price is few riyals more than OPI so about 45 or so. I would say china glaze are exactly like OPI, but in different packaging. The pay off is amazing and the colors don't chip so fast especially if you seal it with a good top coat (  Inglot top coat is amazing). 

The only con is the booth don't have a variety of colors so I would recommend going to Nazih or the place in Alsad. 

Orly: 

Bottom line you won't be able to find it anywhere in Doha, but you can order them online. To be honest I'm not impressed by the ones I bought and I don't think they are worth the 15 $ I paid for. They chip so fast and I don't understand all the fuss was about. 

Orly nail polishes were the first things I bought in DC and I only wore the nail polish once. I bought the metallic ones. 


Recommendations: I will totally splurge on  essie nail polishes especailly dark colors and if I passes by the booth in Villagio and one of china glaze's colors caught my eye I will buy it. For now I won't be ordering any orly products. 


Wednesday, July 11, 2012

Forever Young

Forever Young


I'm back with a new post about looking young, fresh and more important young! It is summer in Qatar and the weather is kind of suffocating, but I love it! Anyway here are the products and the steps to create an effortless natural look with only six steps: 


Step 1: Healthy Skin


If you skip moisturizer in the morning or everyday like me you need to get a tinted moisturizer or any kind of moisturizer. All skin types need all the moisture they can get even oily skin, moisturizers balances the oils that your skin produces. Here is a scientific explanation, oils does not mean water right? oily skin produces oils not water, which is needed to hydrate your skin. Using a moisturizer will help nourish your skin and protect the water in your skin. 


Now let's talk beauty: Tinted Moisturizer


It combines two steps into one!  In order to create a flawless skin you need to apply a tinted moisturizer evenly on your face and don't forget to blend, currently I'm using Laura mercier's ( you can find a brand that you like such as clinique, estee lauder, chanel and bioderma). Tinted moisturizers are perfect for summer they are beneficial for your skin and cover any blemishes. Also, they are not as heavy like foundation which can clogs your poor pores #fail. What do you want more you are hydrating your skin and gaining the look of a dewy and glowing skin perfect for summer.  Most tinted moisturizers have spf in them which is an advantage. 


Step 2: Eyebrows 


Eyebrows the most important feature of your face yet sadly most girls shave them or over tweeze it.  Brows are important because they balance your entire face! So grow your eyebrows back please, one of my pet peeves is when a girl doesn't have a normal eyebrow. God gave you brows for many reasons here are some: 1) they protect your eye from water. 2) all normal people have at least pair of eyebrows. 3) you look unnatural and ugly without brows. 


For natural looking brows use a brow pencil or even an eyeshadow that is either  darker than your hair or similar to it. Actually, one of summer'12 trends is to have a bold eyebrow so don't be afraid of having thick and strong brows #embrace. Now im using clinique's instant lift for brows it has two sides one is a pencil that you can fill your eyebrows with the other is a highlighter to highlight your brow bone. 


 Tip: An important thing that most of us ignore is to add a bright natural looking color into the inner corner of the eyes. This trick not only brightens your eyes, but it also makes you look younger. A makeup artist discovered this tip as he noticed that a babies inner corners are bright and as they get older it gets darker! So adding this light color will turn the clock backwards and makes you look more fresh and young. 


Step 3: Eyeliner and Mascara


Add an eyeliner of your choice and few coats of mascara to make you look more awake. You can lose the eyeliner if you want, but the mascara will definitely make your eyes pop! As you all know by now( if you are dedicated follower to this blog like me) I addicted to sensai's eyeliner. A cat-eye looks amazing on all eyes shape, you only need to adjust the thickness of they line. Bigger eyes means thicker line and small eyes means thiner. 


Step 4: Conceal


Conceal any blemishes and apply some under your eyes to cover any dark circles that you have. If you have acne please avoid adding tons of concealer on the pimple that will dry the pimple and makes it look unpleasant. Moreover, there is a concealer pen by vichy ( medical brand) that helps in decreasing the redness of the pimple or any other scar and conceals it. 
Step 5: Blush

To look younger you have a rosy cheeks like a baby! Add flush of a pinkish or peachy blush to the apple of your cheeks. You might like to use a slightly shimmery color, because its summer! In the picture above is Nars's amour I love this color its pink blusher with a hint of shimmer ( the right amount). 

Step 6: Lip color

Add color to your lips by using any lip liner, lipstick, lip gloss, lip stain. Choose a color that looks similar to your lip color, a color that will enhances your lips and at the same time looks natural. In the picture ' soar' lip liner by MAC cosmetics. The color is pinky flesh tone color, which is perfect!  You can add lip balm if you want but I like it matte. 

Lastly, find the inner diva in you  and be confident! In summer try to use less makeup in the morning. The six steps are easy and makes you look more fresh and awake without using tons of makeup. If you are looking for a dewy and healthy makeup is perfect for summer. Moreover, it is youthful look perfect for everyday. 

xoxo 
@makeupaffairs

Saturday, May 12, 2012

The Original Naked!

Naked1


Hello ladies,

I came back with a review of the original NAKED palette! This palette is amazing for a starter look and affordable it costs less than 300 QR. It is a great price for 12 eyeshadows and works for different looks from bold, edgy, retro and elegant looks. Easy to transform from day to night looks and  the colors pigmentation are  GREAT!


Virgin satin finish, great to use a highlight. Also, amazing to use in a retro look by applying it all over your eyelid, but with a matte highlight.


Sin sparkle pink color lovely to blend to use in a reverse  smokey eye( use the any dark color as an eyelid color and sin as a crease color). Would look amazing with hustle eyeshadow. 


Naked matte soft creamy color, similar to MAC's brule. This color is great for simple smokey eye, retro look and many other looks. This color works for day or night look.


Sidecar dark sparkly brown color, this color is reminds me of dior's iridescent colors, which I'm not a big fan of. Yet, it is nice to apply all over your eyelid with cat-eye maybe put some colorful eyeliner on your inner rim. 


Buck matte almond color, darker than naked. This is amazing color to use as a crease color absolutely amazing! (check the pin up look post)


Half Baked shiny iridescent bronze, I would not use this in a smokey eye as the fallouts will be CRAZY! This color is for a simple everyday look. 


Smog  frosty middle dark brown  similar to snakebite from Naked2,but not as goldish. Great for a dark look or smokey eye. 


Darkhorse frosty dark brown darker than smog. Great for raccoon style eyes, I explained it in the post about naked2. 

Toasted  sparkly pinkish brown color ,I would say it is a gold rose color. I never tried this color, but I'm going to wear it very soon in a smokey eye with hustle or MAC's matte carbon.


Hustle dark purple-brown, lovely for a smokey eye.


Creep a sparkly black color, I'm not a big fan of shimmery black's, but I think its great to use with light matte pinky or flesh tone colors. Oh almost forgot my sister wore it with gunmetal and it was cute on her.


Gunmetal sparkly dark bluey silver, lovely for smokey eyes with black winged eyeliner and black eyeliner on  the inner rim. I love these tones of blues. Loads of mascara maybe pop some fake eyelashes.


Available @ Sephora - Qatar


Hope this helps you Toomie ;) Enjoy this post and share the love. Follow @MakeupAffairs for recent updates and more tips and fun stuff. 


xoxo


roza 


Friday, May 11, 2012

Let's Get Naked!!

Naked 2


Hello gorgeous !
Finally, Sephora-Qatar sells Urban Decay products and I'm in love with each thing I got! I thought I should start with my favorite thing, which is Naked palette 2.  I like this one more than the original, which I'll post about it tomorrow. 
Let's start by talking about the packaging, 
Naked two has a larger mirror than the original palette, I couldn't  use the mirror on the original one since it was so small but this one is a more adequate size. Also, it comes with a dual-ending synthetic brush and a mini lipgloss that I gave to my niece (lipgloss isn't my thing). The most important thing is the case for the NAKED2 is much more durable, the shadows come in a metal case that locks securely, unlike the first package.
Now let's talk colors!(Left---->right)
Foxy - matte cream, great as a highlight. 
Half-Baked - metallic neutral gold.
Bootycall - satin champagne. 
Chopper - metallic rose gold with silver micro glitters.

Tease - matte mushroom taupe with purple undertones, similar to MAC's concrete, but the difference this color is more purplish. 
Snakebite - satin deep bronze brown, me love this color <3 
Suspect - satin light taupe.
Pistol - satin warm steel grey. This color is one of my favorites too. I wore it with verve and my friend M loved the combination of colors. Use verve as the eyelid color and verve in the crease and use hint of blackout to intensify the color, but make sure not over use the black.
Verve - pale metallic pinky grey.
YDK - metallic toasty taupe with coppery micro glitters, it reminds me of dior's iridescent eyeshadows. For that, I believe it is my least favorite color in the palette. Although, the color is amazing!
Busted - satin plummy dark brown, I might  have lied slightly up there by telling pistol is my favorite color! Busted is hands down my favorite color and I wore it many times and every time people I get compliments on my makeup. Its amazing to wear in a racoon style makeup, which is a summer '12 trend. Apply it on your eyelid and blend it softly by adding tease eyeshadow and apply some under your eyes too. I applied a purple eyeliner on my waterlines. Don't forget to apply black eyeliner close to your upper eyelash line and put loads of mascara and Voila!
Blackout - matte black, your basic black eyeshadow. 
I absolutely recommend purchasing this palette as it can be used to achieve multiple makeup looks. The colors are highly pigmented and pretty. Also, it cost less than 300 QR for 12 great colors! More importantly you can achieve rocker chic, glamourous, sparkly, natural and more using the same 12 colors. 
available at Sephora 
Hope you enjoyed this post and I'm so proud to say more than 1000 people viewed my blog yesterday! I know its nothing, but im still proud and exited people do read my blog wooohooo! Anyway follow me on twitter for more updates @MakeupAffairs 
Share the LOVE, 
xoxo 
roza 

Wednesday, May 9, 2012

Pin Up/ Najla's Birthday!

Neno's birthday


Hi ladies,

I came back with a pin up look, actually products that would help in achieving a pin up look. This post is dedicated to my best friend Najla who will be turning 21 years in few hours. I'm proud to say that I know her for the past 7-8 years and we are inseparable. Our friendship is amazing and I wish her a great year and can't wait to see her so hopefully soon! Actually we should take  a class together this summer what do you think anyway here is the pin up/retor look: 


MAC's Studio Fix Fluid SPF 15


I apply foundation using stippling brush, you only need pea-size of the foundation. This is a full coverage foundation and its coverage is build-able. They have a great selection of shades,which suits all skin tones. I love it more than my dior forever foundation. Yet, I believe that most people would feel that MAC's studio fix fluid is not for daily use, but for me I need all the coverage that I can get for now.


Urban Decay's Naked pallete #1

Although, this palette is full of beautiful colors, but for this look we are only using four colors. First, start by applying naked eyeshadow all over the eyelid. Then add some of buck on the crease of they eyes and move upward blend well. Notice that blending is the key for every makeup look and no one would like to look as if someone slapped them on their eyes! Instead of using black color to make the eyes more intense we would use smog which is a rich brown color not too dark. Add it to the crease and blend make sure this doesn't effect the intensity of the color used earlier. Lastly, highlight your brow bone using virgin a champaign color eyeshadow. 


MAC's fluid line in Blacktrack

My favorite gel eyeliner! apply it using an eyeliner brush. Start from the outside to the inside of the eye, it is much easier this way and remember nothing cannot be fixed with a q-tip.  What makes a pin up look different is that they do a winged eye or a cat eye, so make sure to wing it. Blacktrack is the blackest black that you can find in the market and so intense for that I'm in love with it. 


MAC's Lashes in #4
Before you apply false lashes apply your favorite mascara mine is dior's blackout. Then apply a thin layer of duo glue to the eyelashes wait for 40 seconds and apply them to your lash line. Applying fake eyelashes is hard, but with time it gets easier.  Apply a final coat of mascara to blend your lashes with the falsies! 


MAC's Mineralize Concealer


I bought this a week ago and I do enjoy it! It is lighter than MAC's studio sculpt, which apply over the mineralize for perfection. Also, I set this using a wet sponge and maxfactor's powder. I look a wake 100%  and I love it <3


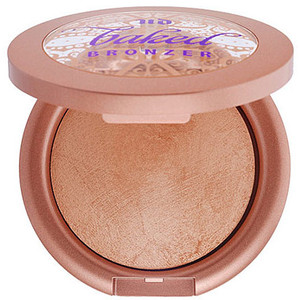
Urban Decay's Baked bronzer

Now is time for my favorite step, which is make a fish face and apply the bronzer! Make sure to apply your bronzer evenly. I love this for summer it has a settle shimmer and even a girl with oily skin like me can wear it =D


MAC's Mineralize Skinfinsh in Soft and gentle

Use this as your highlighter, I absolutely love this product. I can dust this across my cheekbones and temples and it absolutely lights up my face. Pin up looks is about having a matte look, but adding this highlight won't effect the look. Actually, it makes my face glow for that I don't mind it =) 


MAC's lipstick in Lady danger

I absolutely love this color for summer. Make sure to use a lipliner first than apply lady danger. This lip stick has great staying power and is a classic red with a hint of orange. My favorite thing about this lipstick that lady danger is matte, which is perfect for a pin up look. 


Hope you liked this post and make sure to follow me on twitter 

@Makeupaffairs

Share with me your thoughts and comments <3  and follow its FREE! 


Happy Birthday Najla 

xoxo 

roza